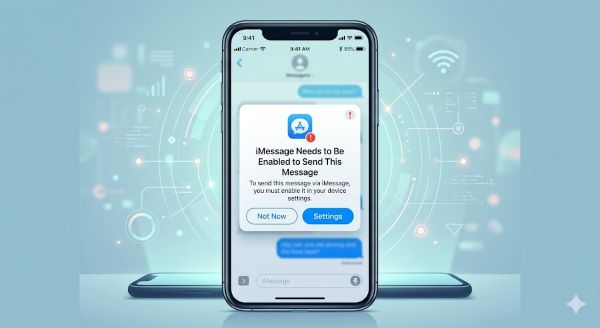
You’re trying to send a message to someone and encounter a frustrating notification: “iMessage needs to be enabled to send this message.” The message won’t go through. You’re left confused about what’s wrong and how to fix it.
This error appears more often than you’d expect. The good news is that iMessage needs to be enabled to send this message is typically a straightforward fix. Understanding what causes the error and how to enable iMessage prevents future frustration and gets your messaging back on track.
What iMessage Is and Why It Matters
iMessage is Apple’s messaging service that sends messages over internet connection rather than through SMS text messaging. When iMessage works, you enjoy unlimited message sending, read receipts, and typing indicators. When it’s disabled, you fall back to standard SMS texting.
The error “iMessage needs to be enabled to send this message” occurs when you’re trying to send what should be an iMessage but your device doesn’t have iMessage active. Your phone recognizes the recipient as an iMessage user but can’t deliver the message without iMessage enabled on your end.
Understanding this distinction helps you grasp why the error appears. Your device isn’t recognizing itself as ready to send iMessages even though the recipient can receive them. This mismatch creates the error message.
Common Reasons iMessage Gets Disabled
Several situations cause iMessage to become disabled. Knowing what triggers this helps you prevent it from happening again.
Your Apple ID changed or you logged out. iMessage ties directly to your Apple ID. Without a valid Apple ID logged in, iMessage can’t function. This is the most common cause of the issue.
You updated iOS and something went wrong during the process. Updates occasionally disable services or fail to properly reinitialize them. This happens rarely but does occur.
You disabled iMessage intentionally to troubleshoot something else. Perhaps you forgot to turn it back on. This simple oversight causes the error to persist.
Your device lost internet connection during iMessage activation. The setup process requires constant internet connectivity. Interruptions prevent proper configuration.
Apple’s servers experienced issues affecting your account. Though rare, server problems can temporarily disable iMessage across multiple devices.
Regional restrictions sometimes affect iMessage availability. In certain countries, iMessage may be restricted or disabled by carrier policies.
How to Enable iMessage on iPhone
Enabling iMessage requires accessing your phone’s settings and following specific steps. The process is straightforward once you know where to look.
Open the Settings app on your iPhone. This is the gray gear icon typically found on your home screen. Tap it to access your phone’s settings.
Scroll down and find “Messages.” This section controls your messaging app settings. Tap on it to view message-related options.
Look for the toggle switch labeled “iMessage.” If this toggle is gray or off, how to enable iMessage starts here. Tap the toggle to turn it on.
Your phone prompts you to sign in with your Apple ID. Enter your Apple ID email address and password. Your device verifies your identity through Apple’s servers.
Wait for the activation to complete. This process usually takes a few seconds but might take longer depending on your internet connection. Don’t close the Settings app while activation is occurring.
Once activation completes, the toggle turns green and shows “on.” iMessage is now enabled on your device.
Test iMessage by sending a message to another iPhone or Mac user. The message should show in blue, indicating it’s an iMessage rather than SMS.
Enabling iMessage on Mac
Mac users can also send iMessages. Enabling iMessage on Mac follows similar but slightly different steps.
Open System Preferences or System Settings on your Mac. The location depends on your macOS version. Newer versions use System Settings. Older versions use System Preferences.
Click “Apple ID” in the sidebar. This section manages your Apple account settings for your Mac.
Click “iCloud” from the options displayed. This shows services linked to your iCloud account.
Find “Messages” in the list of iCloud services. Check the box next to Messages to enable the service.
Your Mac might ask you to sign in with your Apple ID. Enter your credentials and complete the authentication.
Once enabled, Messages on your Mac can send and receive iMessages through your Apple ID.
Ensuring Your Apple ID Is Correct
iMessage activation requires the correct Apple ID. Problems with your Apple ID account often cause iMessage errors.
Verify that you’re signed into Settings with your correct Apple ID. Go to Settings > [Your Name] at the top of the screen. This shows your currently logged-in Apple ID.
If the Apple ID shown is incorrect or outdated, sign out and back in with the correct account. Go to Settings > [Current Apple ID] > Sign Out. Confirm the sign-out.
Return to Settings and sign back in with your correct Apple ID. Enter your email and password carefully.
Factor authentication might be required. Complete any two-factor authentication steps your Apple account requires.
Once you’ve confirmed your correct Apple ID, return to Messages settings and re-enable iMessage.
Troubleshooting iMessage Not Working
Sometimes iMessage not working continues even after you think you’ve enabled it. Several troubleshooting steps help resolve persistent issues.
Check your internet connection first. iMessage requires WiFi or cellular data to function. Confirm that your device has active internet connectivity.
Restart your iPhone or Mac completely. Power it off fully and turn it back on. This simple step resolves many temporary issues affecting iMessage.
Toggle iMessage off and back on. Go to Settings > Messages and turn off the iMessage toggle. Wait 30 seconds, then turn it back on.
Check if you’re using the correct phone number or email for iMessage. Your device might be trying to send an iMessage to a contact that doesn’t have iMessage capability. In that case, SMS is the appropriate protocol.
Sign out of your Apple ID completely. In Settings > [Your Name], select “Sign Out.” Confirm this action. Then sign back in with your correct credentials.
Update your iOS to the latest version. Go to Settings > General > Software Update. Install any available updates.
Contact Apple Support if issues persist. Persistent problems might indicate account issues requiring Apple’s technical support.
How to Turn On iMessage on Different Devices
“How to turn on iMessage” varies slightly across Apple devices. Understanding the differences prevents confusion.
iPhone: Settings > Messages > Toggle iMessage on
iPad: Settings > Messages > Toggle iMessage on
Mac: System Settings > Apple ID > iCloud > Enable Messages
Apple Watch: Apple Watch app on paired iPhone > Messages > Toggle iMessage
Each device uses iMessage through your Apple ID. Enabling on one device doesn’t automatically enable on others. You need to enable iMessage separately for each device you use.
Using multiple devices with iMessage enabled provides seamless experience. Messages sync across all your Apple devices, allowing sending and receiving from whichever device is convenient.
Checking Account Settings and Activation Status
Understanding your account status helps diagnose iMessage problems. Checking your settings confirms everything is configured correctly.
Visit Apple’s iforgot.apple.com if you’re unsure about your Apple ID. This site lets you verify account details and reset password if needed.
Check your billing information in Settings > [Your Name] > Payment Method. Accounts with expired payment methods sometimes experience service interruptions.
Verify your trusted phone number in Settings > [Your Name] > Password and Security. This confirms your account security is properly configured.
Ensure you haven’t been temporarily locked out of your account. Multiple failed login attempts trigger security lockouts. Wait a few hours before trying again.
Using WiFi vs. Cellular Data for iMessage
iMessage works over either WiFi or cellular data. Understanding this flexibility helps troubleshoot connectivity issues.
WiFi iMessage typically sends faster and more reliably. If you have stable WiFi, iMessage through WiFi is ideal.
Cellular data works equally well for iMessage on most networks. If WiFi isn’t available, cellular data enables iMessage sending.
Some carriers throttle iMessage traffic. In rare cases, switching from cellular to WiFi improves delivery reliability.
If iMessage fails on cellular but works on WiFi, your carrier might be the issue. Contact them about data connectivity or iMessage support.
When iMessage Falls Back to SMS
Understanding when iMessage switches to SMS helps you know what’s happening with your messages.
If the recipient doesn’t have iMessage, your message automatically sends as SMS. You’ll see a green message bubble instead of blue.
If iMessage is temporarily unavailable, your phone attempts to send as SMS instead. This fallback prevents messages from getting stuck.
You can manually choose SMS by holding down the message and selecting “Send as Text Message.” This option appears when both iMessage and SMS are available.
Some contacts might have iMessage disabled on their devices. In these cases, SMS is necessary for message delivery.
Handling iMessage Activation Delays
Sometimes iMessage takes time to activate. Knowing how long to wait prevents unnecessary troubleshooting.
Initial iMessage activation can take up to 24 hours. Apple’s servers process your request and configure your account.
Usually activation completes within minutes or a few hours. If activation hasn’t completed after 24 hours, something is wrong.
Factors affecting activation speed include:
- Internet connection stability and speed
- Apple server load and processing time
- Account verification status
- Regional server availability
If activation takes longer than expected, try signing out of your Apple ID and signing back in. This sometimes speeds up the process.
Confirming iMessage Is Working Properly
Once you think iMessage is enabled, verify it’s actually working. This confirmation prevents future frustration.
Send a test iMessage to another iPhone or Mac user. Look for the blue message bubble. Blue indicates iMessage. Green indicates SMS.
Check that read receipts appear. When iMessage works, you see “Delivered” and “Read” status. SMS doesn’t provide these indicators.
Send a message to yourself using an alternate Apple device. This confirms iMessage is working across your devices.
Share a photo using iMessage. iMessage photo sharing works differently from SMS. This tests whether full iMessage functionality is active.
Key Takeaways
- iMessage needs to be enabled to send this message error occurs when iMessage is disabled on your device despite the recipient having iMessage capability.
- How to enable iMessage on iPhone involves going to Settings > Messages and toggling the iMessage switch on.
- Your Apple ID must be signed in and valid for iMessage not working to be resolved.
- How to turn on iMessage differs slightly across devices with each requiring separate activation in their own settings.
- iMessage requires internet connection through WiFi or cellular data to function properly.
- Restarting your device often resolves temporary iMessage issues.
- iMessage activation can take up to 24 hours initially, though it usually completes within minutes.
- Toggling iMessage off and back on serves as an effective troubleshooting step for persistent problems.
- Blue message bubbles indicate iMessage is working. Green bubbles indicate SMS fallback.
- Check your internet connection first when experiencing iMessage problems.
- Signing out of your Apple ID and signing back in can resolve account-related iMessage issues.
- Each Apple device requires separate iMessage activation using the same Apple ID.
- iMessage automatically falls back to SMS if the recipient doesn’t have iMessage capability.
- Factor authentication might be required during iMessage setup on your account.
- Persistent iMessage problems might require contacting Apple Support for account assistance.